WIP - Ork Looted: Forgeworld Warlord Titan Arioch Power Claw - FINISHED!!!!!!!!!!!
Posted: Mon Jan 22, 2018 4:16 am
Recently, a friend of mine bought two of the Warlord power Claws here:
https://www.forgeworld.co.uk/en-DE/Warl ... Power-Claw
One of these will be made into terrain, while the other he wanted looted into an "Orky vehicle."
Me: What kind of vehicle do you want it to be?
Him: We'll use it for any damned thing we want to. It's a looted f***ing Warlord Power Claw!
Me: Okay. I'll make it happen.
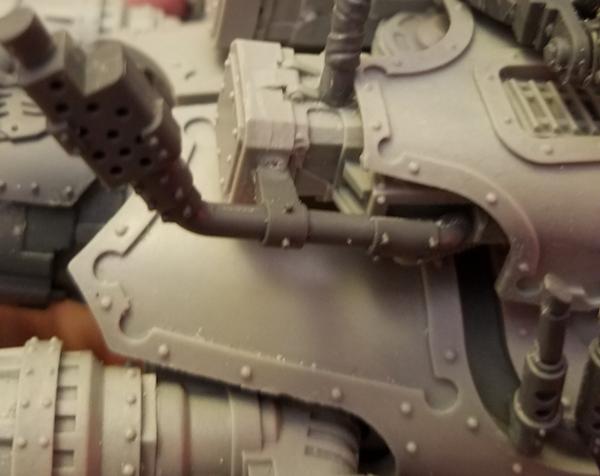
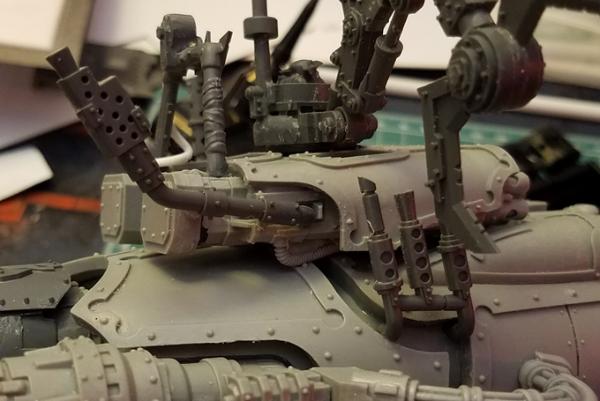
Because he bought two of them, you'll see that there's a (I don't know? Power cell?) piece on one side that is usually only a singular piece on the actual claw. Since the other claw was going to just be terrain, I did the proppa Orky thing... and looted it. Now, there are matching power cells, one on each side!
Eventually, when it's finally created, I'll get some images of the terrain pieces.
Here are the kits at my disposal:
Ork Trukk
Ork Battlewagon
Space Marine Storm Raven
2x Forgeworld Warlord Titan Arioch Power Claws (only 1 full kit will be used, with the other reserved for terrain, as previously mentioned)
Various plasticard pieces.
--------------------------------------
A note on my style of converting...
"Clip, glue, go!"
I don't plan anything. I look at what my need is and what I have available to me. From there, I go with it. I'll find or make what I need.
I do measurements on the fly. They're a combination of actual measurements and eyeballing.
If there's a piece I need that doesn't exist, I'll snip and clip multiple pieces to convert into the piece I'm looking for.
--------------------------------------
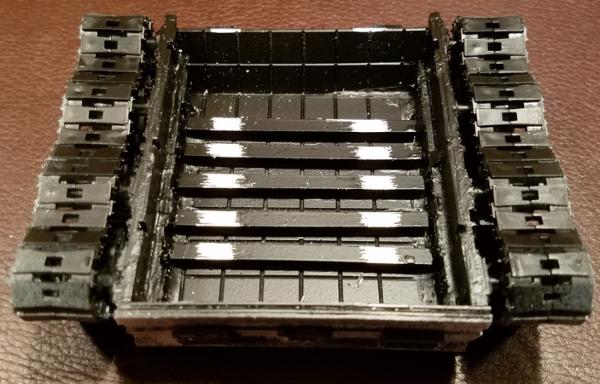
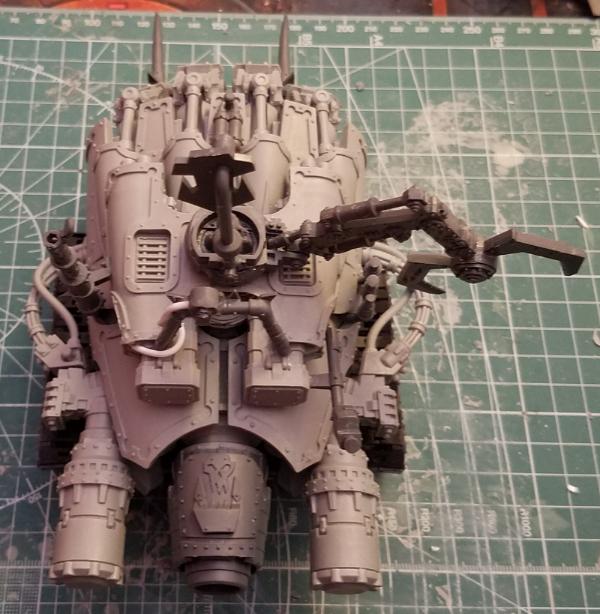
We get together every Saturday. As such, there is only 2 days of work into this, so far. Last week I put together the fist, itself I added the Trukk frame as an undercarriage, and attached the Battlewagon Tracks in the back.
I honestly didn't even think about keeping a WIP thread at that time, so there are no images from then.
I had somewhere between 4 and 6 hours into it that day.
I worked on it again yesterday.
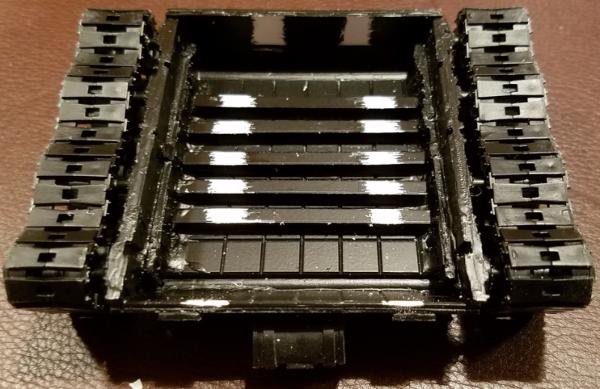
He'd been looking at it all week, and decided the tracks were too narrow. Either I needed to get another set and add them next to the tracks that were there, or widen the frame.
Frankly, I was glad of it. I thought the bottom was a bit too narrow. In fact, the pieces were tacked together with the barest bit of superglue, just in case (normally, I prefer to use plastic glue on plastic joins, occasionally supplemented by super glue).
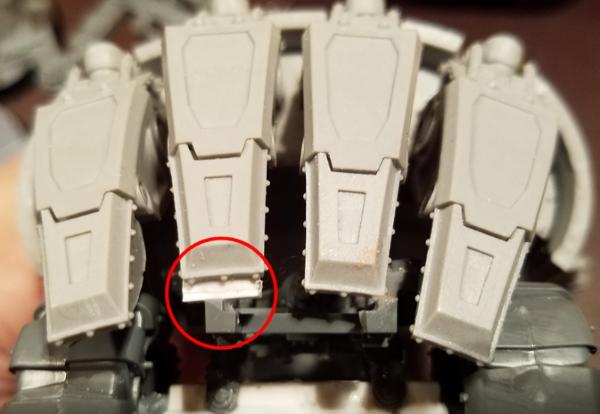
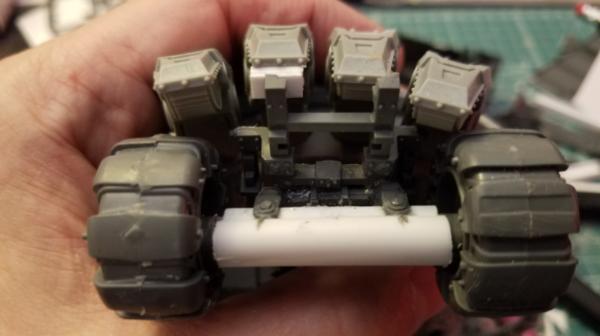
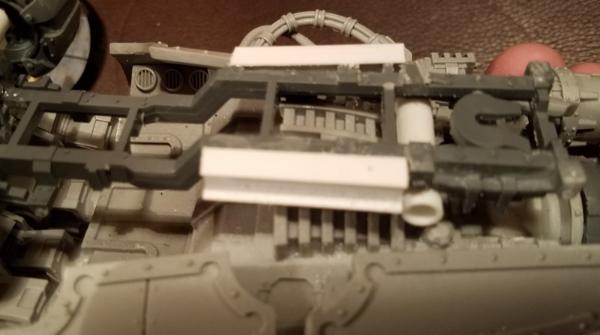
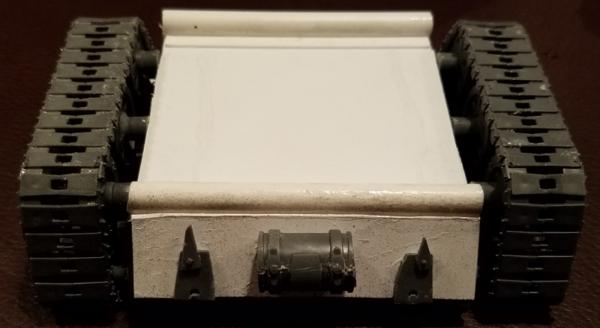
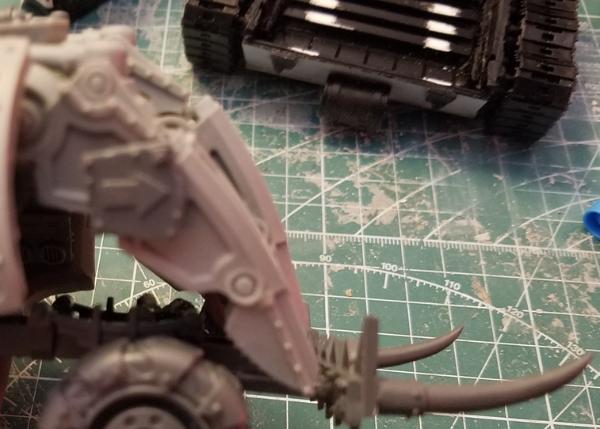
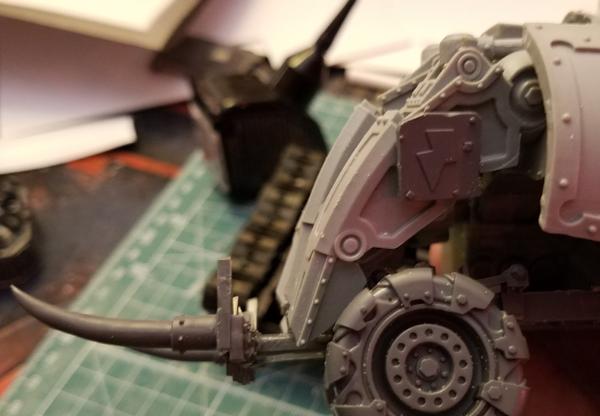
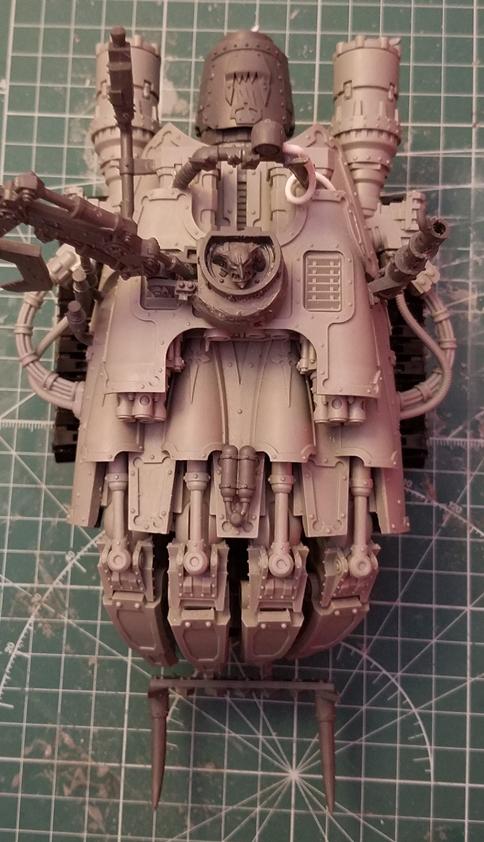
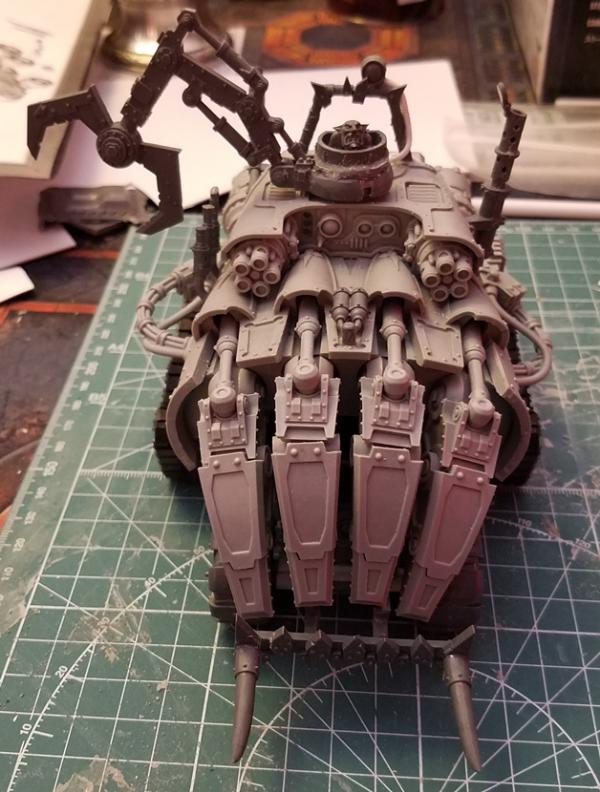
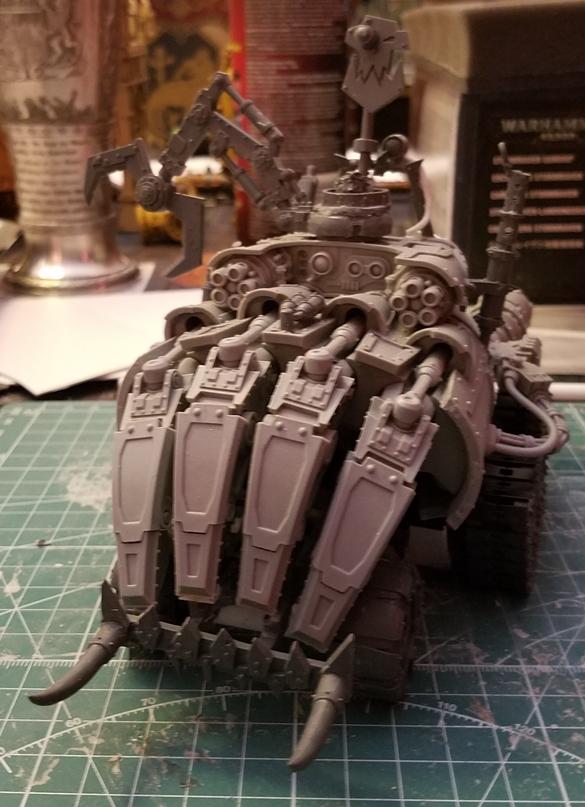
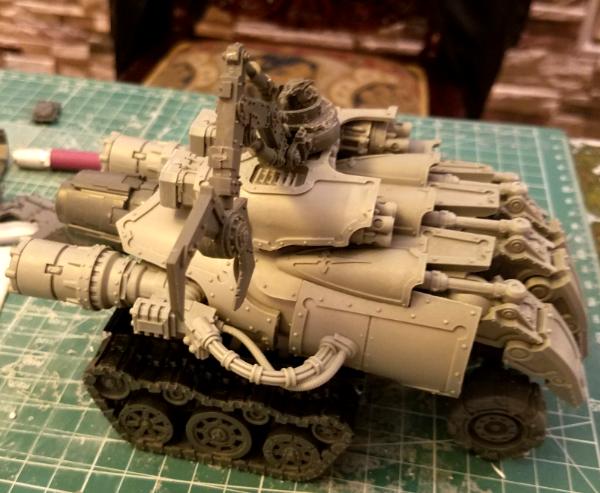
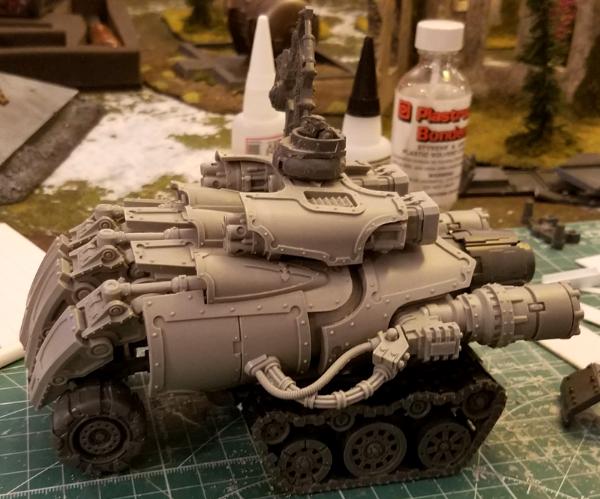
My work this week was to build an entire rear end that the Claw could sit on without being too high. Height was the trick, as he/we didn't like it if it sat too high. We'd experimented with a number of heights last week, and the only thing we liked was to have the fist sitting almost exactly on top of the tracks, with VERY little clearance. I also built and added the Grabbing Klaw with Gobbo driver and the front tires. The tire assembly was quite the trick. I didn't want it to look TOO unrealistic (not that it'll be seen when in use), but I wanted to use Ork bits as much as possible. All in all, I'd say I probably have 9 or 10 more hours into it this week, maybe more. Seems like a lot for as little as was added, but like I said, the entire rear end/undercarriage was built from scratch with plasticard, and I built 2 or 3 iterations before I was happy.
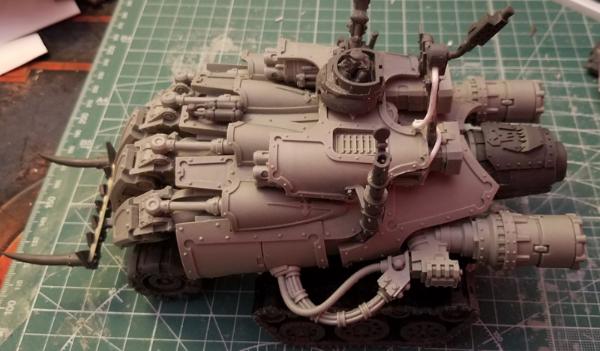
I'll have more/better pics last week. These were taken right before leaving, and as an afterthought. So, I just snapped some pics of it as it sits.
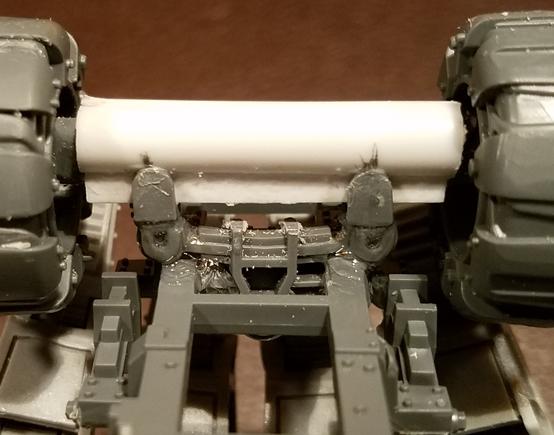
Right now, the rear undercarriage is NOT attached (the front wheels are), so I'll be able to get more detailed images next weekend.
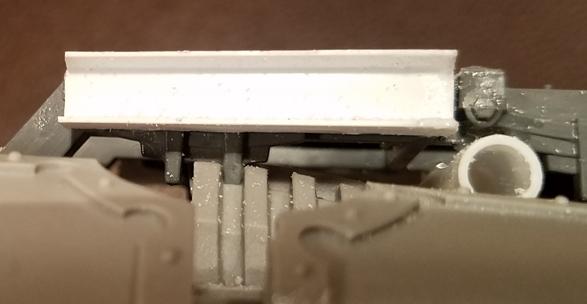
I had a view from the front, but wasn't checking the pics as I took them. Apparently, I moved. I got dizzy just trying to LOOK at the image. LOL
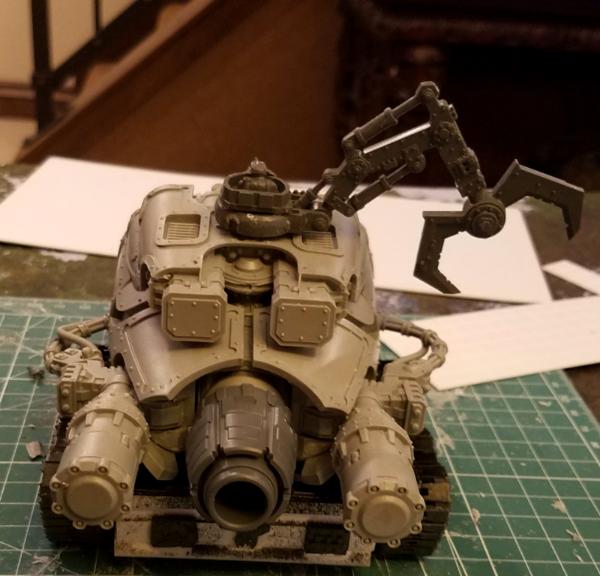
The black you see in the image above is because the undercarriage is hollow. Little will be done with it, paint wise. As such, I went ahead and primed the inside black. Since the main body of it's all plasticard sheet, tube, H-beam and I-beam, it was a stark white. I wanted it primed before we got around to gluing it together. This way, there's no risk of any white glaring out at us. The hollow, shadowed areas down in there will be black.
Input and suggestions are greatly appreciated.
Plans for the future:
Add a gunner.
I'm not sure exactly how this will go. Either a small platform/cab will be added behind the Gobbo/driver using the Trukk driver bits , appropriately converted to make it clear that he's operating the guns. I'm working on this, just to see what it'll look like. I'm honestly not sure how happy I'll be with hip, but he's the first option I'm looking at.
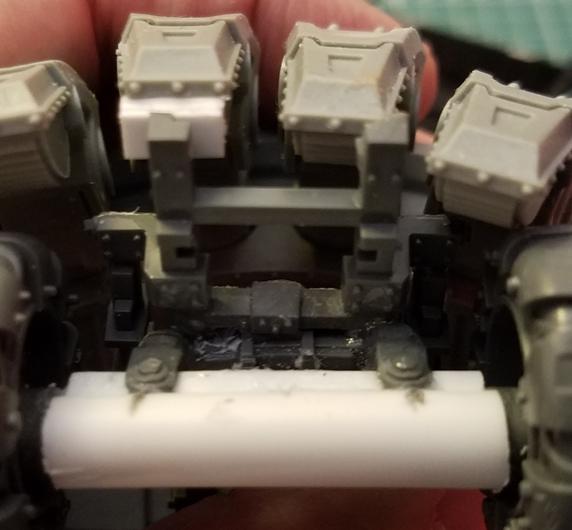
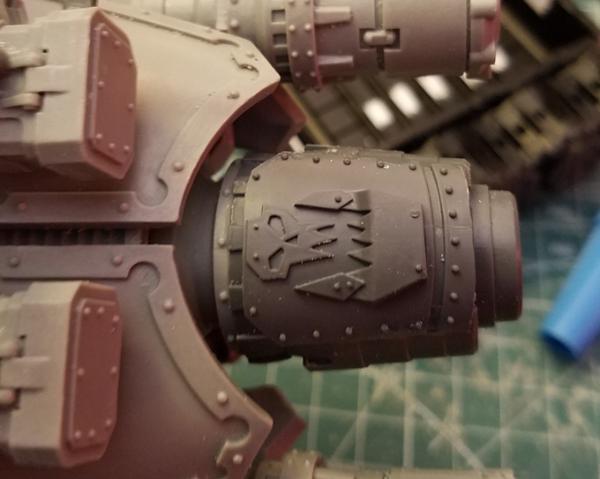
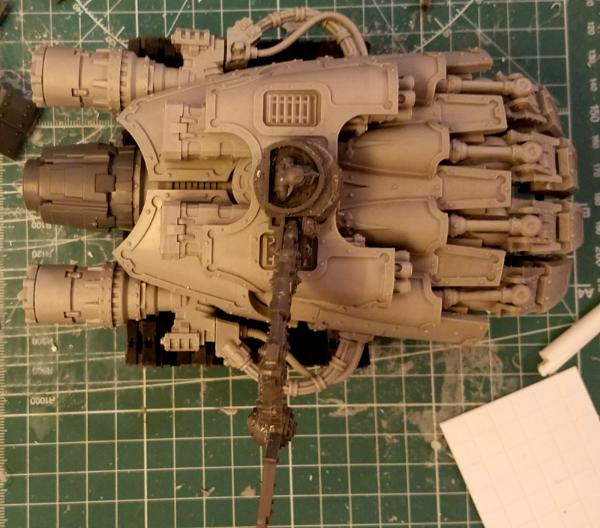
Another option is to mount a couple ork gunners with "trigger" hands from the Battlewagon kit, one on each side. As shown in the 3rd pic above, there are nice, flat panels on the rear of each side of the gun. These could easily be Orkied up properly.
Thanks for looking!
Eric
https://www.forgeworld.co.uk/en-DE/Warl ... Power-Claw
One of these will be made into terrain, while the other he wanted looted into an "Orky vehicle."
Me: What kind of vehicle do you want it to be?
Him: We'll use it for any damned thing we want to. It's a looted f***ing Warlord Power Claw!
Me: Okay. I'll make it happen.
Because he bought two of them, you'll see that there's a (I don't know? Power cell?) piece on one side that is usually only a singular piece on the actual claw. Since the other claw was going to just be terrain, I did the proppa Orky thing... and looted it. Now, there are matching power cells, one on each side!
Eventually, when it's finally created, I'll get some images of the terrain pieces.
Here are the kits at my disposal:
Ork Trukk
Ork Battlewagon
Space Marine Storm Raven
2x Forgeworld Warlord Titan Arioch Power Claws (only 1 full kit will be used, with the other reserved for terrain, as previously mentioned)
Various plasticard pieces.
--------------------------------------
A note on my style of converting...
"Clip, glue, go!"
I don't plan anything. I look at what my need is and what I have available to me. From there, I go with it. I'll find or make what I need.
I do measurements on the fly. They're a combination of actual measurements and eyeballing.
If there's a piece I need that doesn't exist, I'll snip and clip multiple pieces to convert into the piece I'm looking for.
--------------------------------------
We get together every Saturday. As such, there is only 2 days of work into this, so far. Last week I put together the fist, itself I added the Trukk frame as an undercarriage, and attached the Battlewagon Tracks in the back.
I honestly didn't even think about keeping a WIP thread at that time, so there are no images from then.
I had somewhere between 4 and 6 hours into it that day.
I worked on it again yesterday.
He'd been looking at it all week, and decided the tracks were too narrow. Either I needed to get another set and add them next to the tracks that were there, or widen the frame.
Frankly, I was glad of it. I thought the bottom was a bit too narrow. In fact, the pieces were tacked together with the barest bit of superglue, just in case (normally, I prefer to use plastic glue on plastic joins, occasionally supplemented by super glue).
My work this week was to build an entire rear end that the Claw could sit on without being too high. Height was the trick, as he/we didn't like it if it sat too high. We'd experimented with a number of heights last week, and the only thing we liked was to have the fist sitting almost exactly on top of the tracks, with VERY little clearance. I also built and added the Grabbing Klaw with Gobbo driver and the front tires. The tire assembly was quite the trick. I didn't want it to look TOO unrealistic (not that it'll be seen when in use), but I wanted to use Ork bits as much as possible. All in all, I'd say I probably have 9 or 10 more hours into it this week, maybe more. Seems like a lot for as little as was added, but like I said, the entire rear end/undercarriage was built from scratch with plasticard, and I built 2 or 3 iterations before I was happy.
I'll have more/better pics last week. These were taken right before leaving, and as an afterthought. So, I just snapped some pics of it as it sits.
Right now, the rear undercarriage is NOT attached (the front wheels are), so I'll be able to get more detailed images next weekend.
I had a view from the front, but wasn't checking the pics as I took them. Apparently, I moved. I got dizzy just trying to LOOK at the image. LOL
The black you see in the image above is because the undercarriage is hollow. Little will be done with it, paint wise. As such, I went ahead and primed the inside black. Since the main body of it's all plasticard sheet, tube, H-beam and I-beam, it was a stark white. I wanted it primed before we got around to gluing it together. This way, there's no risk of any white glaring out at us. The hollow, shadowed areas down in there will be black.
Input and suggestions are greatly appreciated.
Plans for the future:
Add a gunner.
I'm not sure exactly how this will go. Either a small platform/cab will be added behind the Gobbo/driver using the Trukk driver bits , appropriately converted to make it clear that he's operating the guns. I'm working on this, just to see what it'll look like. I'm honestly not sure how happy I'll be with hip, but he's the first option I'm looking at.
Another option is to mount a couple ork gunners with "trigger" hands from the Battlewagon kit, one on each side. As shown in the 3rd pic above, there are nice, flat panels on the rear of each side of the gun. These could easily be Orkied up properly.
Thanks for looking!
Eric